Learning Made Sweet and Fun: Baking the Famous Pineapple Cake


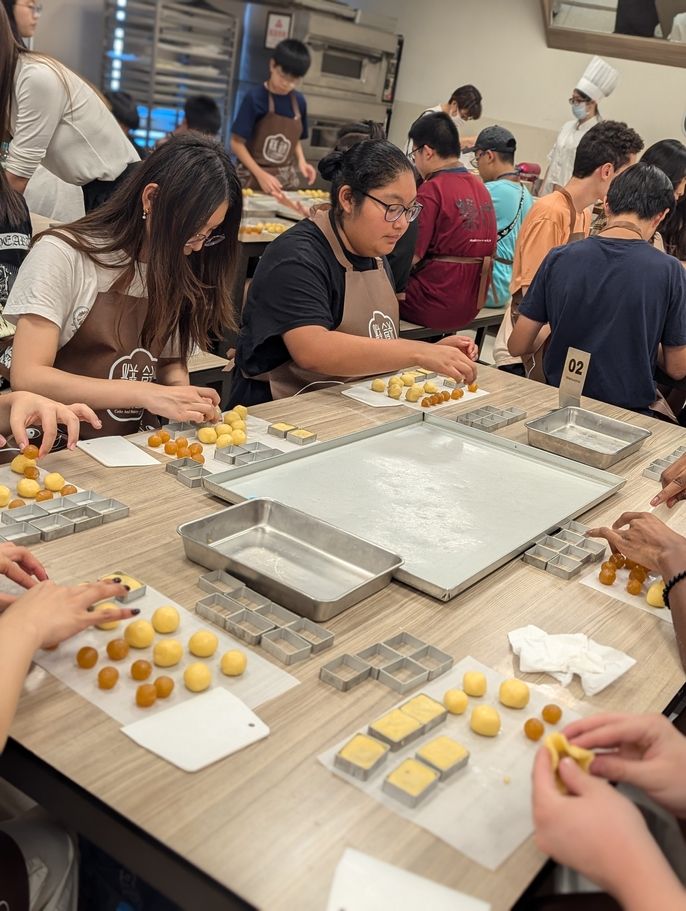
This afternoon's cultural activity was one of my favorites! We enjoyed a refreshing break from the heat, learning how to bake pineapple cake. The students had a blast baking and eating the delicious treat.
Did you know pineapples are a big deal in Taiwan? Pineapple cakes have become more popular than even mooncakes during the Lunar New Year, symbolizing hopes for an auspicious year. From special occasions to everyday hospitality, they are a staple gesture of friendship and gratitude.
Although not native, Portuguese merchants brought them to Taiwan in the 16th century. The warm climate, especially in Pintung County, was perfect for growing pineapples. Originally, pineapple cakes in Taiwan were large and symbolic of fortune, reserved for royalty and weddings. During Japanese rule (1895-1945), Taiwan’s pineapple industry boomed. The Japanese aimed to make Taiwan a “model colony” and focused on expanding its pineapple production and export. With more pineapples available, the cakes evolved into smaller, more accessible treats. Today, they symbolize luck and prosperity, often given as gifts to wish for a sweet future and a prosperous family.
I found this recipe online-https://whattocooktoday.com/taiwan-pineapple-cakes.html (it is very similar to what we did), so you can make the recipe at home.
EQUIPMENT
- Pineapple tart mold
- digital kitchen scale
- Parchment Paper
INGREDIENTS
PASTRY:
- 85 gr butter unsalted, softened
- 30 gr icing sugar (powdered sugar)
- 18 gr egg yolk (room temperature) 18-20 grams (about 1 egg yolk)
- 15 gr condensed milk
DRY INGREDIENTS:
- 120g cake flour
- 15g milk powder
- 5g grated parmesan cheese
- 1/2 tsp salt
PINEAPPLE JAM:
- 300g pineapple jam ( we also used wintermelon jam)
YOU WILL NEED:
- Rectangle pineapple tart mold
INSTRUCTIONS
- I suggest you prepare the pineapple jam at least the day before and let it chill in the fridge. Portion out the filling into 18-gram portion and roll into round balls for easier wrapping. Cover and let them chill in the fridge until ready to be used
PREPARE PASTRY DOUGH:
- Line a large baking sheet with parchment paper. Whisk all the dry ingredients in a bowl and set aside
- Put the softened butter in a mixing bowl. Cream on medium speed for about 2-3 minutes, just until it's creamy, don't overbeat. Add icing sugar and beat again until just mixed. Add the room temperature egg yolk and condensed milk and mix again until just combined. Add the dry ingredients. Use a spatula to fold to combine. It may appear dry at first. Then use your hand to form a dough. Wrap it with a cling wrap and let it rest for 30 minutes at room temperature (not the fridge) to relax the gluten
WRAPPING:
- After resting, portion the dough out into about 20-22 grams dough ball. Roll them into round balls and keep them cover to prevent the dough from drying out
- Work with one dough at a time. Flatten the dough and roll into about 3-inch circle, roughly. Place one filling in the middle and wrap the dough around it. Gently stretch the dough to cover the filling and roll it into a round ball. Put this round ball into the mold and place on top of a baking sheet. If the mold you have comes with a press, use that to press the dough to fit into the mold corner to corner. Turn it over and do the same on the other side to make sure the surface is flat and level. The pastry will expand a bit after baking, so there should be a tiny bit of room left on top
- Put the whole tray inside the fridge to let them chill for 15 minutes. Preheat oven to 340 F (170 C) while waiting
BAKING:
- Bake on the middle rack for 10-15 minutes or until golden brown (I need 15 minutes). Then remove from the oven and use a tong to flip each mold over and return to the oven to bake again for another 5-8 minutes or until golden brown again. I need 8 minutes
- Remove from the oven and let them cool down for 5 minutes and then lift off the mold (it will slide right off). Transfer to a cooling rack to cool down completely. Then transfer to an air-tight container and store for a week at room temperature
WAIT FOR AT LEAST 24 HOURS BEFORE SERVING (RECOMMENDED):
- This pineapple tart doesn't taste as good the same day you make them. I highly suggest waiting for at least 24 hours (I know, it's hard!) before serving them. They seriously tastes better and better as time goes.
Related Posts

How I Studied Abroad as a Freshman in High School
Thinking about what to do the summer after your freshman year? Check out how one of our alumni studied abroad in Taipei, Taiwan at such a young age and how you can too!

Exploring the Rich Culture of Tainan: An American Students' Journey
In a rapidly globalizing world, experiencing diverse cultures has become an essential part of education. For a group of American students, a two-day and one-night trip to Tainan, Taiwan, offered... keep reading

Adventures in Shifen and Jiufen!
This trip took us to Shifen and Jiufen in New Taipei City, where we enjoyed a day full of adventure and fun. In Shifen, the students experienced the unique activity... keep reading